Create a Connector
There are multiple steps involved in creating a connector, from configuring the display properties to adding the connector events and actions –
To create a connector,
- Log in to your CMP instance.
- On the connector listing page, click New Connector.

Basic Details
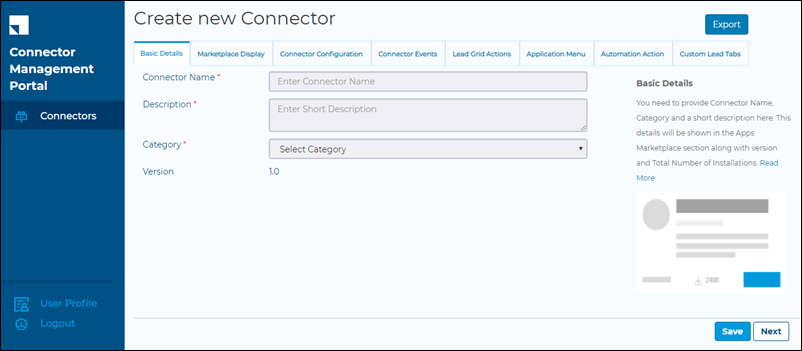
This tab lets you configure what the connector will look like on the Apps Marketplace listing page. Enter the required details, then click Save. Click Next to proceed to the next tab.
| Field | Description | Example |
| Connector Name | The name of your connector. Maximum characters is 20. | 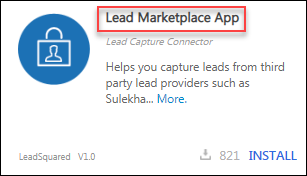 |
| Description | A brief description of the connector. Maximum characters is 200. | 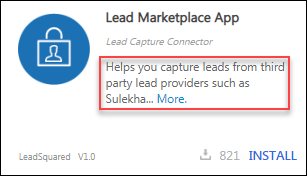 |
| Category | Select the category of the connector from the drop-down. For example, SMS, Telephony, Chat, etc. The app will be listed in the marketplace based on the category. | 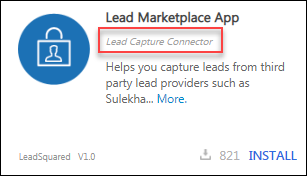 |
| Version | The first time you build a connector, the version is set to v1.0 by default. | 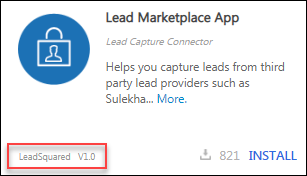 |
Note: The number of installations will be automatically reflected.
Marketplace Display
When users click on a connector from the connectors listing page, they’re directed to a standalone page connector details page. Here, you can list in-depth details on your connector, its features and benefits, links to help documentation and more.
Use the Save button to save your configurations and Back and Next for navigating between tabs.
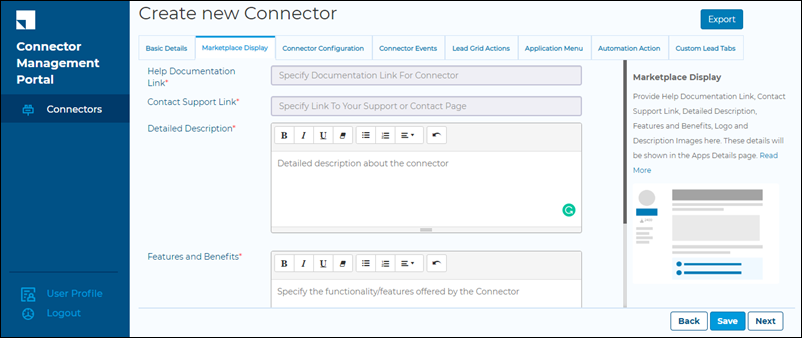
| Field | Description | Example |
| Help Documentation Link | URL for a help documentation page for the connector. |  |
| Contact Support Link | URL for a contact support page. |  |
| Detailed Description | The in-depth description of the connector. |  |
| Features and Benefits | Specify the features and benefits of the connector. |  |
| Logo | Upload a logo for the connector.
|
 |
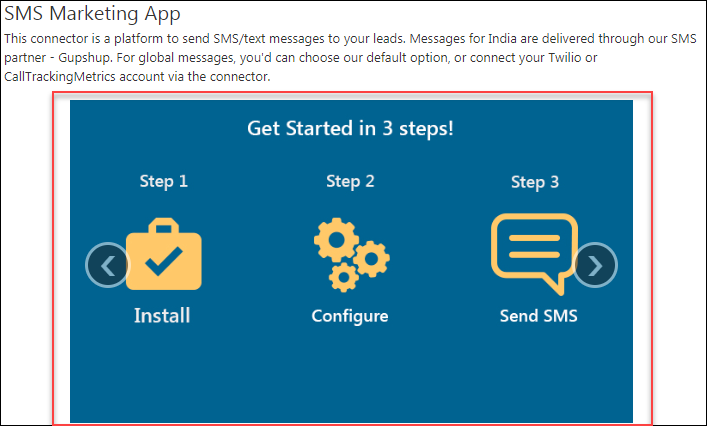
| Description Images | Display a series of images depicting your connector’s functionality and benefits.
|
 |
Connector Configuration
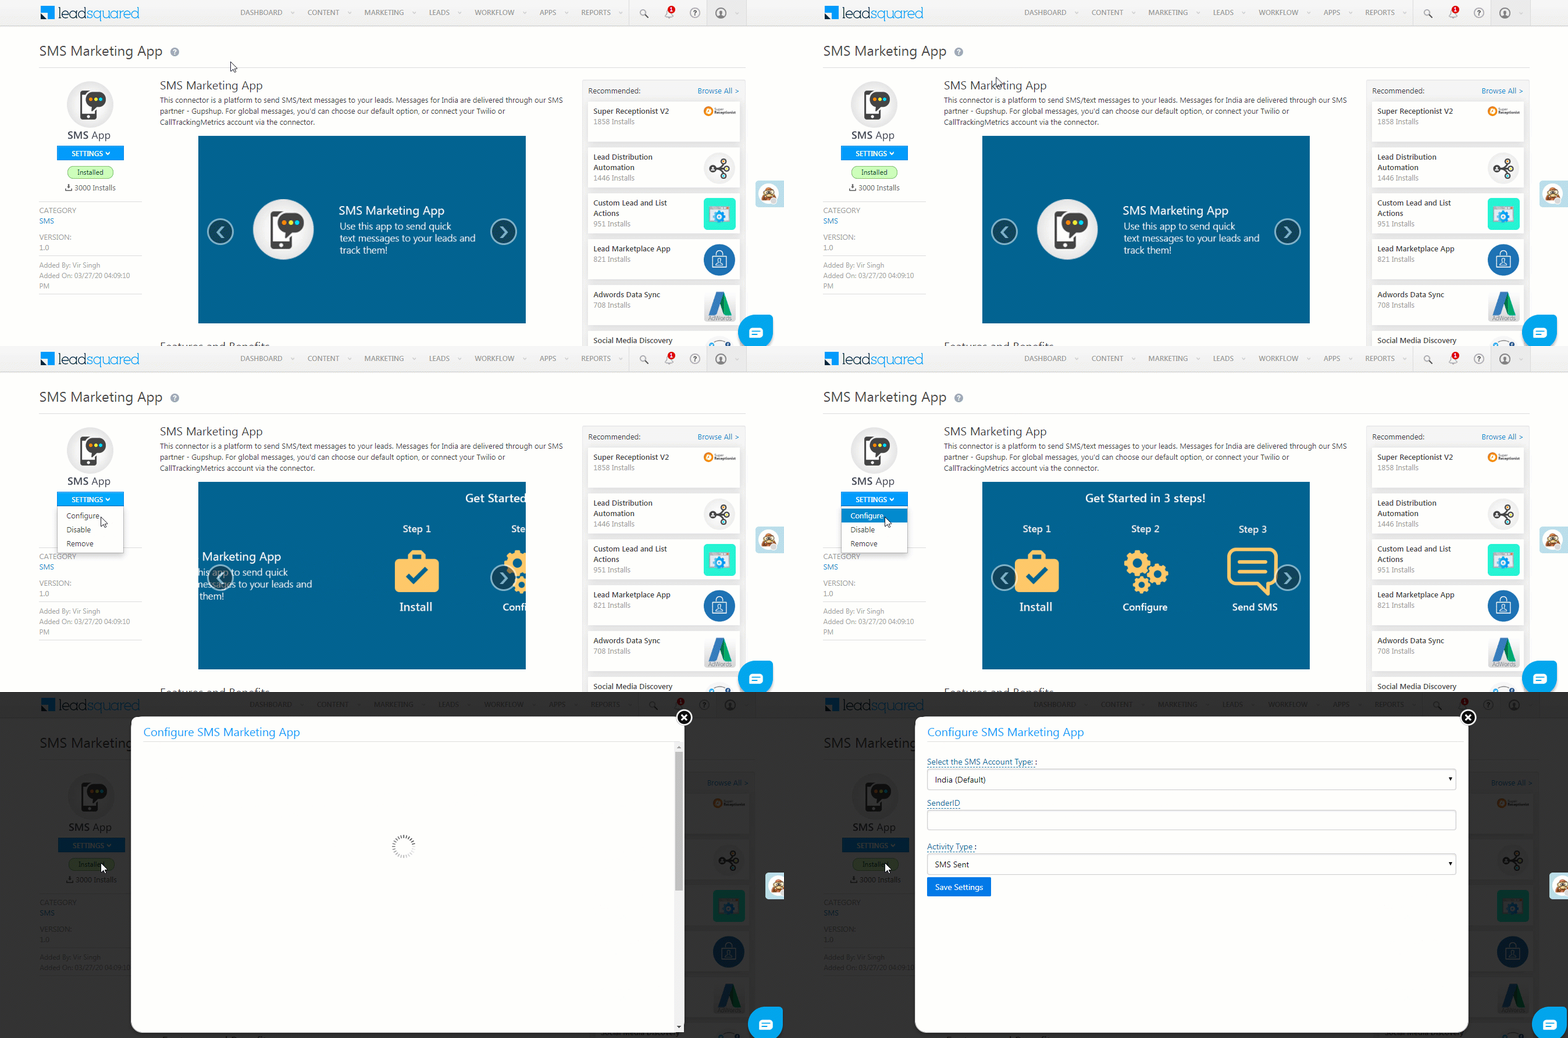
Specify the Iframe URL for your connector configuration screen here. When a user clicks Configure on the connector, this URL will be displayed within a pop-up window.
The height and width of the connector configuration screen can be configured either through the Customer Marketplace Portal or through this V2 API.
Merge parameters can be appended to the URL to access records dynamically. Click View Merge Fields to add merge parameters to the URL.
For example, you can append @{User:AccessKey,}&@{User:SecretKey,} to dynamically get the access and secret keys associated with the LeadSquared account. You can use these keys for authentication and ensure only administrator users can access the connector configurations.
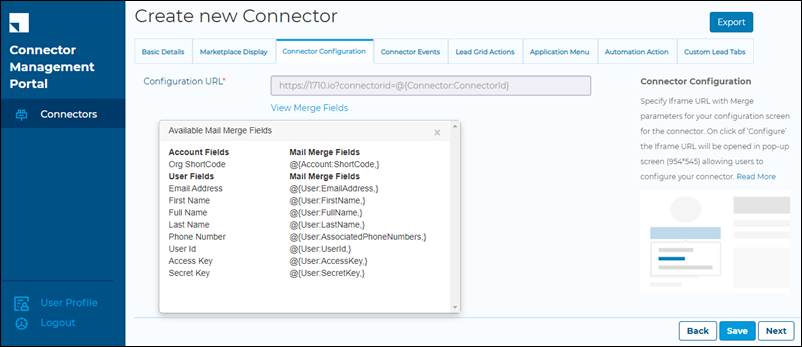
Merge fields available for connector configuration.
| Resource | Name | Value | Type | Description |
| Account | Org ShortCode | @{Account:ShortCode,} |
String | The shortcode of your LeadSquared account. |
| User | Email Address | @{User:EmailAddress,} |
String | User’s email address |
| First Name | @{User:FirstName,} |
String | User’s first name | |
| Full Name | @{User:FullName,} |
String | User’s full name. Concatenates ‘First Name’ and ‘Last Name’ strings. | |
| Last Name | @{User:LastName,} |
String | User’s last name | |
| Phone Number | @{User:AssociatedPhoneNumbers,} |
Number | User’s phone number | |
| User Id | @{User:UserId,} |
String | User’s Id | |
| Access Key | @{User:AccessKey,} |
String | API access key | |
| Secret Key | @{User:SecretKey,} |
String | API secret key |
Connector Events
Configure the installation, uninstallation, enable and disable events for the connector here.

| Event Type | Description |
| Installation Event | Triggered when a user installs the connector from the Apps Marketplace. You can take various actions on the event such as push the organization and user details to your system, send an automated email to the user, etc. 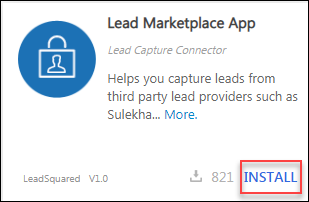 |
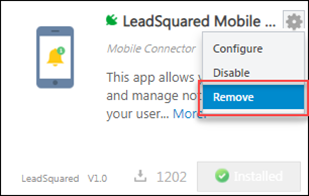
| Uninstallation Event | Triggered when a user removes the connector. Some examples of actions you can take are removing authorization credentials and configurations from your system, deleting the user’s details, etc.
|
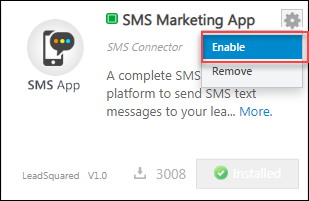
| Enable Event | Triggered when the connector is enabled after the disable event.
|
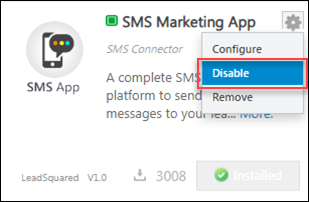
| Disable Event | Triggered when the user disables the connector. On this event, you can disable the flow of data between the systems
|
For each event, you can configure the following –
| Field | Description |
| API URL | Specify the URL of the web API to call on the event. Merge parameters can be appended to the URL to access records dynamically. Click View Merge Fields to add merge parameters to the URL.
For information on LeadSquared API, check out our API docs. |
| HTTP Method | GET or POST.
|
| Content Type | Only supported format is JSON. This is automatically passed as a header in the request. |
Merge fields available for connector events –
| Resource | Merge Field | Value | Type | Description |
| Account | Org ShortCode | @{Account:ShortCode,} |
String | The shortcode of your LeadSquared account. |
| User | Email Address | @{User:EmailAddress,} |
String | User’s email address |
| First Name | @{User:FirstName,} |
String | User’s first name | |
| Full Name | @{User:FullName,} |
String | User’s full name. Concatenates ‘First Name’ and ‘Last Name’ strings. | |
| Last Name | @{User:LastName,} |
String | User’s last name | |
| Phone Number | @{User:AssociatedPhoneNumbers,} |
Number | User’s phone number | |
| User Id | @{User:UserId,} |
String | User’s Id | |
| Access Key | @{User:AccessKey,} |
String | API access key | |
| Secret Key | @{User:SecretKey,} |
String | API secret key |
Lead Grid Actions
Actions you configure in this section will appear in the lead grids throughout the application. These include actions that can be performed on specified leads or in bulk.
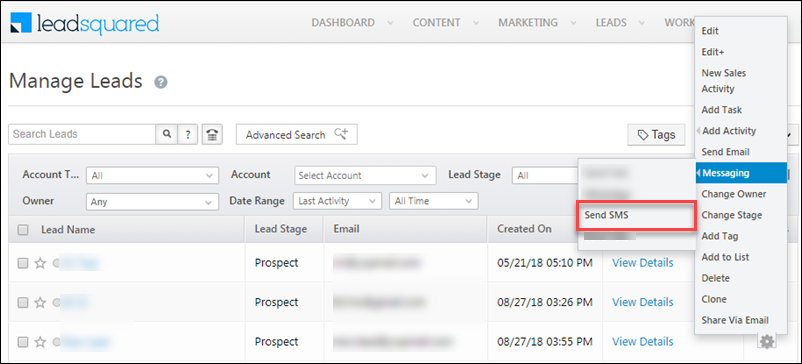
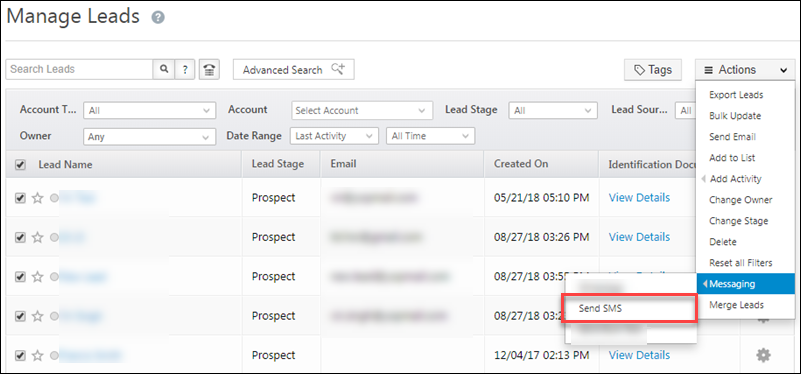
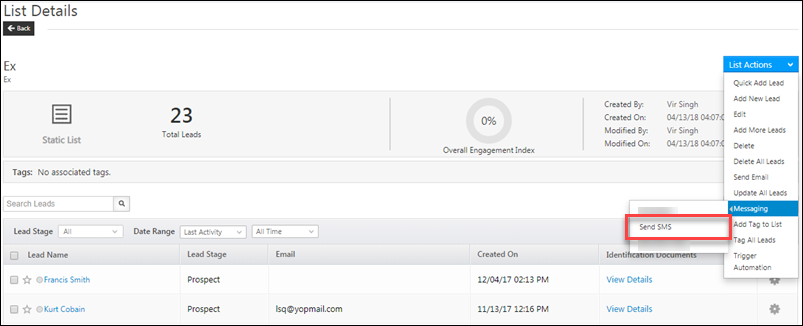
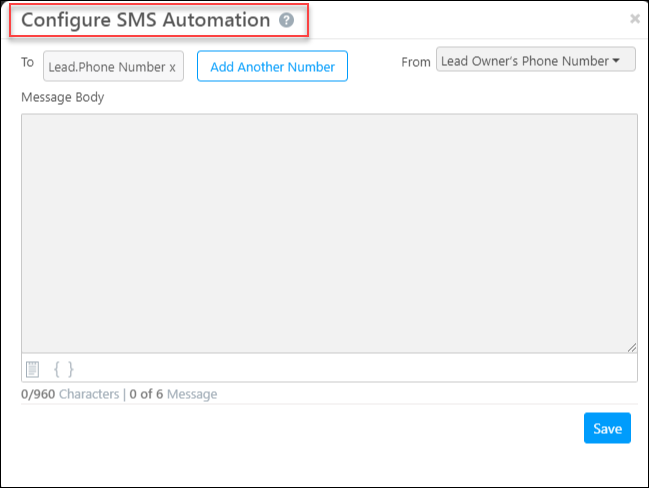
For example, you can create a ‘Send SMS’ action that appears on the lead grid of the Manage Leads page. When a user clicks the action for a certain lead, a pop-up is launched and an IFrame is displayed. You can use merge fields like @{Lead:FirstName,} and @{Lead:Mobile,} to enable users to send SMS –
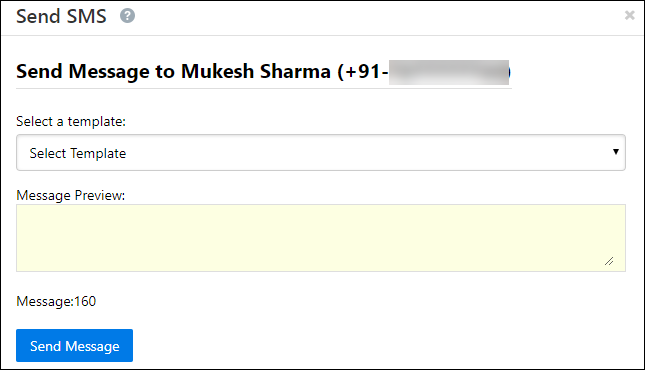
Actions are configurable from the Lead Grid Actions tab.
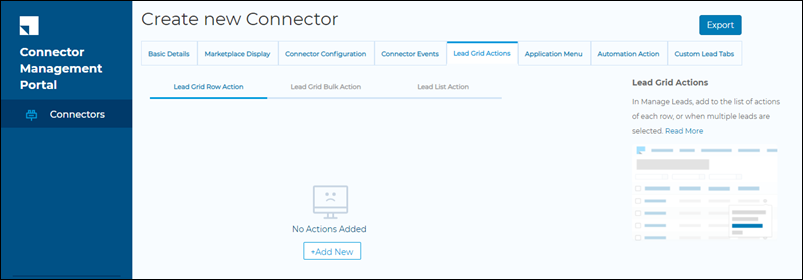
| UI Area | Description |
| Lead Grid Row Action | Appears as a list action on the Manage Leads, Smart Views (lead tabs) and Lead Details, pages within the application.
|
| Lead Grid Bulk Action | Appears as a bulk action the Manage Leads and Smart Views (lead tabs) pages within the application.
|
| Lead List Action | Appears as an action on the List Details page. Allows you to perform the action on all leads within the list.
|
Configure the following for each action, and click Next when you’re done.
| Field | Description |
| Action Label | The name of the action that will appear on the UI. |
| Show Action | Show the action on the LeadSquared web app and/or mobile app. |
| Available to Roles | Select the user roles the action will be visible to. |
| Action Type |
|
| API URL | Specify the URL of the web API to call on the event. Merge parameters can be appended to the URL to access records dynamically. Click View Merge Fields to add merge parameters to the URL.
For information on LeadSquared API, check out our API docs. |
| HTTP Method | GET or POST.
|
| Content Type | Only supported format is JSON. This is automatically passed as a header in the request. |
Merge fields available for lead grid actions –
| Resource | Merge Field | Value | Type | Description |
| Lead | First Name | @{Lead:FirstName,} |
String | Lead’s first name |
| Last Name | @{Lead:LastName,} |
String | Lead’s last name | |
@{Lead:EmailAddress,} |
String | Lead’s email address | ||
| Source | @{Lead:Source Lead,} |
String | Source the lead was acquired from (organic search, direct traffic, etc.) | |
| Notes | @{Lead:Notes,} |
String | Notes on the lead | |
| Phone Number | @{Lead:Phone,} |
Number | Lead’s phone number | |
| Mobile Number | @{Lead:Mobile,} |
Number | Lead’s mobile number | |
| Website | @{Lead:Website,} |
String | Lead’s website | |
| Company | @{Lead:Company,} |
String | Lead’s organization | |
| Job Title | @{Lead:JobTitle,} |
String | Lead’s job designation | |
| Score | @{Lead:Score Lead,} |
Number | Lead’s score (measured according to the lead’s activity) | |
| Created On | @{Lead:CreatedOn,} |
Date | Date the lead was created | |
| Modified On | @{Lead:ModifiedOn,} |
Date | Date the lead was modified | |
| Prospect Creation Date | @{Lead:LeadConversionDate,} |
Date | Date the prospect (on your website) was converted to a lead (in LeadSquared) | |
| Address 1 | @{Lead:mx_Street1,} |
String | Lead’s address | |
| Address 2 | @{Lead:mx_Street2,} |
String | Lead’s address | |
| City | @{Lead:mx_City,} |
String | Lead’s city | |
| State | @{Lead:mx_State,} |
String | Lead’s state | |
| Country | @{Lead:mx_Country,} |
String | Lead’s country | |
| Zip | @{Lead:mx_Zip,} |
String | Lead’s zip | |
| Owner | @{Lead:OwnerIdName,} |
String | Lead owner’s name | |
| Owner Email | @{Lead:OwnerIdEmailAddress,} |
String | Lead owner’s email | |
| Created By | @{Lead:CreatedByName,} |
String | User that created the lead | |
| Modified By | @{Lead:ModifiedByName,} |
String | User that modified the lead | |
| Source Campaign | @{Lead:SourceCampaign,} |
String | The source marketing campaign through which the lead was acquired | |
| Source Content | @{Lead:SourceContent,} |
String | The source content channel through which the lead was acquired | |
| Engagement Score | @{Lead:EngagementScore,} |
Number | The lead’s engagement score (measured according to the lead’s recent activity) | |
| Order Value | @{Lead:Revenue,} |
Number | Revenue from the lead | |
@{Lead:TwitterId,} |
String | Lead’s Twitter Id | ||
@{Lead:FacebookId,} |
String | Lead’s Facebook Id | ||
@{Lead:LinkedInId,} |
String | Lead’s LinkedIn Id | ||
| Skype Name | @{Lead:SkypeId,} |
String | Lead’s Skype Id | |
| GTalk User | @{Lead:GtalkId,} |
String | Lead’s GTalk Id | |
| Google Plus | @{Lead:GooglePlusId,} |
String | Lead’s Google Plus Id | |
| Photo URL | @{Lead:PhotoUrl,} |
String | URL for the lead’s photo | |
| Current Opt In Status | @{Lead:CurrentOptInStatus,} |
String | Whether the lead has opted-in or out of email communication | |
| Opt In Date | @{Lead:OptInDate,} |
Date | The date the lead has opted-in or out of email communication | |
| Opt In Details | @{Lead:OptInDetails,} |
String | Notes related to the lead’s opt-in status | |
| Last Opt In Email Sent Date | @{Lead:LastOptInEmailSentDate,} |
Date | The date the last opt-in related email was sent | |
| Lead Age | @{Lead:LeadAge,} |
Number | The age of the lead in the system | |
| Account | Org ShortCode | @{Account:ShortCode,} |
String | The shortcode of your LeadSquared account. |
| User | Email Address | @{User:EmailAddress,} |
String | User’s email address |
| First Name | @{User:FirstName,} |
String | User’s first name | |
| Full Name | @{User:FullName,} |
String | User’s full name. Concatenates ‘First Name’ and ‘Last Name’ strings. | |
| Last Name | @{User:LastName,} |
String | User’s last name | |
| Phone Number | @{User:AssociatedPhoneNumbers,} |
Number | User’s phone number | |
| User Id | @{User:UserId,} |
String | User’s Id | |
| Access Key | @{User:AccessKey,} |
String | API access key | |
| Secret Key | @{User:SecretKey,} |
String | API secret key |
Application Menu
Actions you add here will appear on the LeadSquared main menu under Apps. When a user clicks the menu item, a new page will be displayed where you can configure an IFrame.

Each action requires the following details. Click Next when you’re done, or Back to navigate to the previous menu.
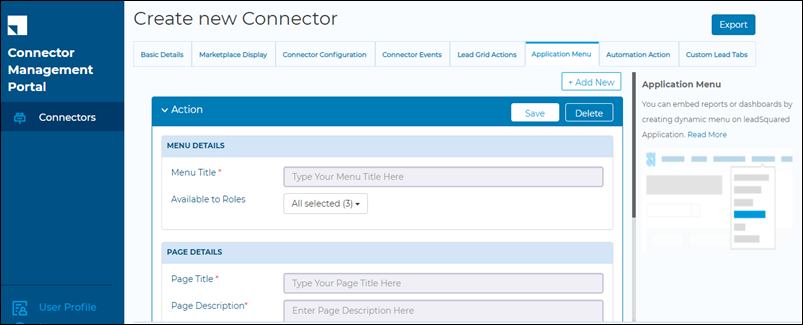
| Field | Description |
| Menu Title | The label of the menu action. |
| Available to Roles | Select the user roles the action will be visible to. |
| Page Title | Title of the new page that opens when the menu item is clicked. |
| Page Description | A brief description of the actions available on the page. |
| Iframe URL | The Iframe URL to display on the new page. Merge parameters can be appended to the URL to access records dynamically. Click View Merge Fields to add merge parameters to the URL. |
| Help Documentation Link | URL for help documentation. |
| Video URL | URL for a video tutorial. |
Merge fields available for application menu –
| Resource | Merge Field | Value | Type | Description |
| Account | Org ShortCode | @{Account:ShortCode,} |
String | The shortcode of your LeadSquared account. |
| User | Email Address | @{User:EmailAddress,} |
String | User’s email address |
| First Name | @{User:FirstName,} |
String | User’s first name | |
| Full Name | @{User:FullName,} |
String | User’s full name. Concatenates ‘First Name’ and ‘Last Name’ strings. | |
| Last Name | @{User:LastName,} |
String | User’s last name | |
| Phone Number | @{User:AssociatedPhoneNumbers,} |
Number | User’s phone number | |
| User Id | @{User:UserId,} |
String | User’s Id | |
| Access Key | @{User:AccessKey,} |
String | API access key | |
| Secret Key | @{User:SecretKey,} |
String | API secret key |
Automation Action
Add actions for your connector that can be triggered on lead, activity, task, or account-based automations. For example, you can automate a ‘Send SMS’ action to trigger whenever a new lead is added to your account.
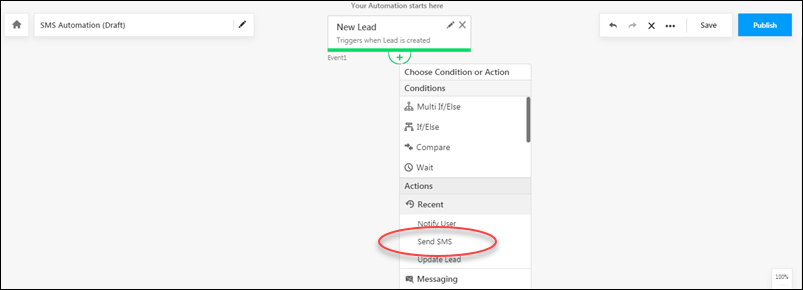
The following configurations are required –
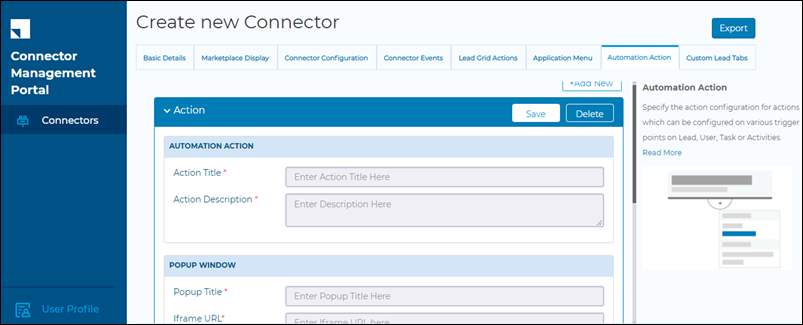
| Field | Description |
| Action Title | The label of the automation action. |
| Action Description | A brief description of the action. |
| Popup Title | The name of the popup that appears when a user clicks the automation action.
|
| Iframe URL | The Iframe URL to display in the popup. Merge parameters can be appended to the URL to access records dynamically. Click View Merge Fields to add merge parameters to the URL. For example, you can pass merge fields to get the lead and user’s phone numbers. |
| Popup Dimensions | The height and width of the popup in pixels. |
| Help Documentation Link | URL for help documentation. |
| Execution URL | |
| Content Type | Only supported format is JSON. |
| HTTP Method | Only POST requests are supported. |
Merge fields available in automation actions –
| Resource | Merge Field | Value | Type | Description |
| Automation | Action Id | @{Automation:ActionId,} |
String | Id of the automation action. |
| Process Definition Id | @{AutomationId:ProcessDefinitionId,} |
String | ||
| Account | Org ShortCode | @{Account:ShortCode,} |
String | The shortcode of your LeadSquared account. |
| User | Email Address | @{User:EmailAddress,} |
String | User’s email address |
| First Name | @{User:FirstName,} |
String | User’s first name | |
| Full Name | @{User:FullName,} |
String | User’s full name. Concatenates ‘First Name’ and ‘Last Name’ strings. | |
| Last Name | @{User:LastName,} |
String | User’s last name | |
| Phone Number | @{User:AssociatedPhoneNumbers,} |
Number | User’s phone number | |
| User Id | @{User:UserId,} |
String | User’s Id | |
| Access Key | @{User:AccessKey,} |
String | API access key | |
| Secret Key | @{User:SecretKey,} |
String | API secret key |
Custom Lead Tabs
Configure custom tabs to appear on the lead details page.
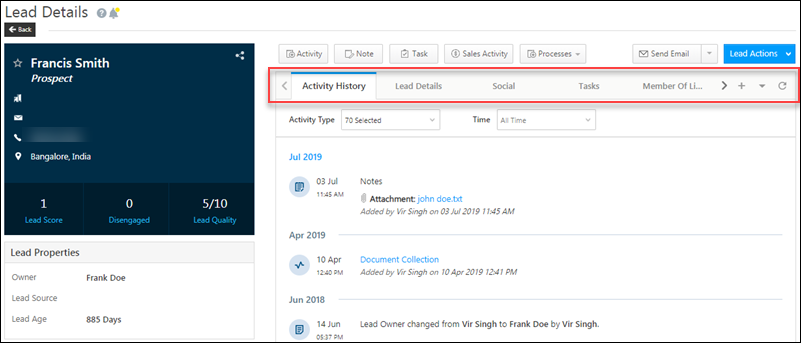
Enter the following details to create custom tabs –
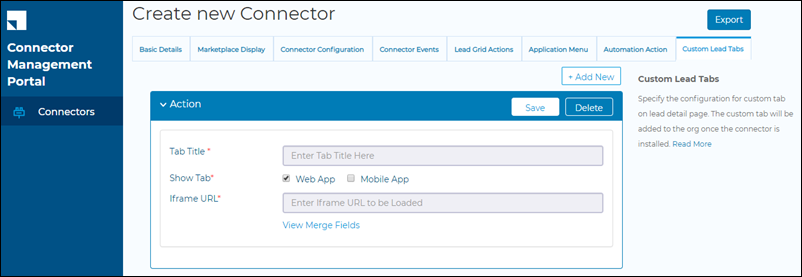
| Field | Description |
| Tab Title | The title of the tab action. |
| Show Tab | Show the action on the LeadSquared web app and/or mobile app. |
| Iframe URL | The Iframe URL to display in the popup. Merge parameters can be appended to the URL to access records dynamically. Click View Merge Fields to add merge parameters to the URL. |
Merge fields available for custom lead tabs –
| Resource | Merge Field | Value | Type | Description |
| Lead | First Name | @{Lead:FirstName,} |
String | Lead’s first name |
| Last Name | @{Lead:LastName,} |
String | Lead’s last name | |
@{Lead:EmailAddress,} |
String | Lead’s email address | ||
| Source | @{Lead:Source Lead,} |
String | Source the lead was acquired from (organic search, direct traffic, etc.) | |
| Notes | @{Lead:Notes,} |
String | Notes on the lead | |
| Phone Number | @{Lead:Phone,} |
Number | Lead’s phone number | |
| Mobile Number | @{Lead:Mobile,} |
Number | Lead’s mobile number | |
| Website | @{Lead:Website,} |
String | Lead’s website | |
| Company | @{Lead:Company,} |
String | Lead’s organization | |
| Job Title | @{Lead:JobTitle,} |
String | Lead’s job designation | |
| Score | @{Lead:Score Lead,} |
Number | Lead’s score (measured according to the lead’s activity) | |
| Created On | @{Lead:CreatedOn,} |
Date | Date the lead was created | |
| Modified On | @{Lead:ModifiedOn,} |
Date | Date the lead was last modified | |
| Prospect Creation Date | @{Lead:LeadConversionDate,} |
Date | Date the prospect (on your website) was converted to a lead (in LeadSquared) | |
| Address 1 | @{Lead:mx_Street1,} |
String | Lead’s address | |
| Address 2 | @{Lead:mx_Street2,} |
String | Lead’s address | |
| City | @{Lead:mx_City,} |
String | Lead’s city | |
| State | @{Lead:mx_State,} |
String | Lead’s state | |
| Country | @{Lead:mx_Country,} |
String | Lead’s country | |
| Zip | @{Lead:mx_Zip,} |
String | Lead’s zip | |
| Owner | @{Lead:OwnerIdName,} |
String | Lead owner’s name | |
| Owner Email | @{Lead:OwnerIdEmailAddress,} |
String | Lead owner’s email | |
| Created By | @{Lead:CreatedByName,} |
String | User that created the lead | |
| Modified By | @{Lead:ModifiedByName,} |
String | User that modified the lead | |
| Source Campaign | @{Lead:SourceCampaign,} |
String | The source marketing campaign through which the lead was acquired | |
| Source Content | @{Lead:SourceContent,} |
String | The source content channel through which the lead was acquired | |
| Engagement Score | @{Lead:EngagementScore,} |
Number | The lead’s engagement score (measured according to the lead’s recent activity) | |
| Order Value | @{Lead:Revenue,} |
Number | Revenue from the lead | |
@{Lead:TwitterId,} |
String | Lead’s Twitter Id | ||
@{Lead:FacebookId,} |
String | Lead’s Facebook Id | ||
@{Lead:LinkedInId,} |
String | Lead’s LinkedIn Id | ||
| Skype Name | @{Lead:SkypeId,} |
String | Lead’s Skype Id | |
| GTalk User | @{Lead:GtalkId,} |
String | Lead’s GTalk Id | |
| Google Plus | @{Lead:GooglePlusId,} |
String | Lead’s Google Plus Id | |
| Photo URL | @{Lead:PhotoUrl,} |
String | URL for the lead’s photo | |
| Current Opt In Status | @{Lead:CurrentOptInStatus,} |
String | Whether the lead has opted-in or out of email communication | |
| Opt In Date | @{Lead:OptInDate,} |
Date | The date the lead has opted-in or out of email communication | |
| Opt In Details | @{Lead:OptInDetails,} |
String | Notes related to the lead’s opt-in status | |
| Last Opt In Email Sent Date | @{Lead:LastOptInEmailSentDate,} |
Date | The date the last opt-in related email was sent | |
| Lead Age | @{Lead:LeadAge,} |
Number | The age of the lead in the system | |
| Account | Org ShortCode | @{Account:ShortCode,} |
String | The shortcode of your LeadSquared account. |
| User | Email Address | @{User:EmailAddress,} |
String | User’s email address |
| First Name | @{User:FirstName,} |
String | User’s first name | |
| Full Name | @{User:FullName,} |
String | User’s full name. Concatenates ‘First Name’ and ‘Last Name’ strings. | |
| Last Name | @{User:LastName,} |
String | User’s last name | |
| Phone Number | @{User:AssociatedPhoneNumbers,} |
Number | User’s phone number | |
| User Id | @{User:UserId,} |
String | User’s Id | |
| Access Key | @{User:AccessKey,} |
String | API access key | |
| Secret Key | @{User:SecretKey,} |
String | API secret key |
Next Steps
After your connector is created, you must submit it for review. See Manage Connectors.


