
Getting Started with Mavis
Prerequisites
- Administrator access to a LeadSquared account.
- Mavis DB is available on all plans, but not by default. To enable it on your account, please reach out to your account manager, or write to support@leadsquared.com.
Getting Started
- Create DB
- Create Tables
- Define Table Schema
- Import CSV and Validate data
- Consume data in LeadSquared
* To programmatically access and perform operations on Mavis, such as Create, Update, Delete DBs/tables, Data Fetch Operations (using relational/logical operators, etc.), Export, etc., see Mavis APIs.
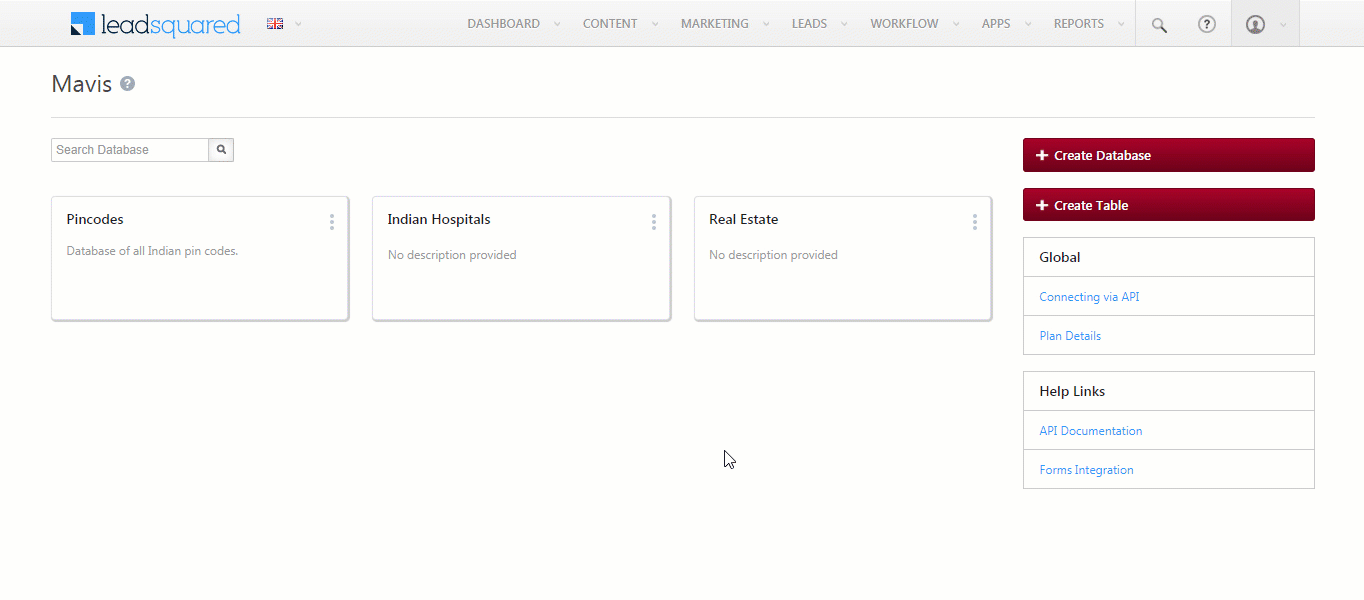
Manage Mavis DB UI
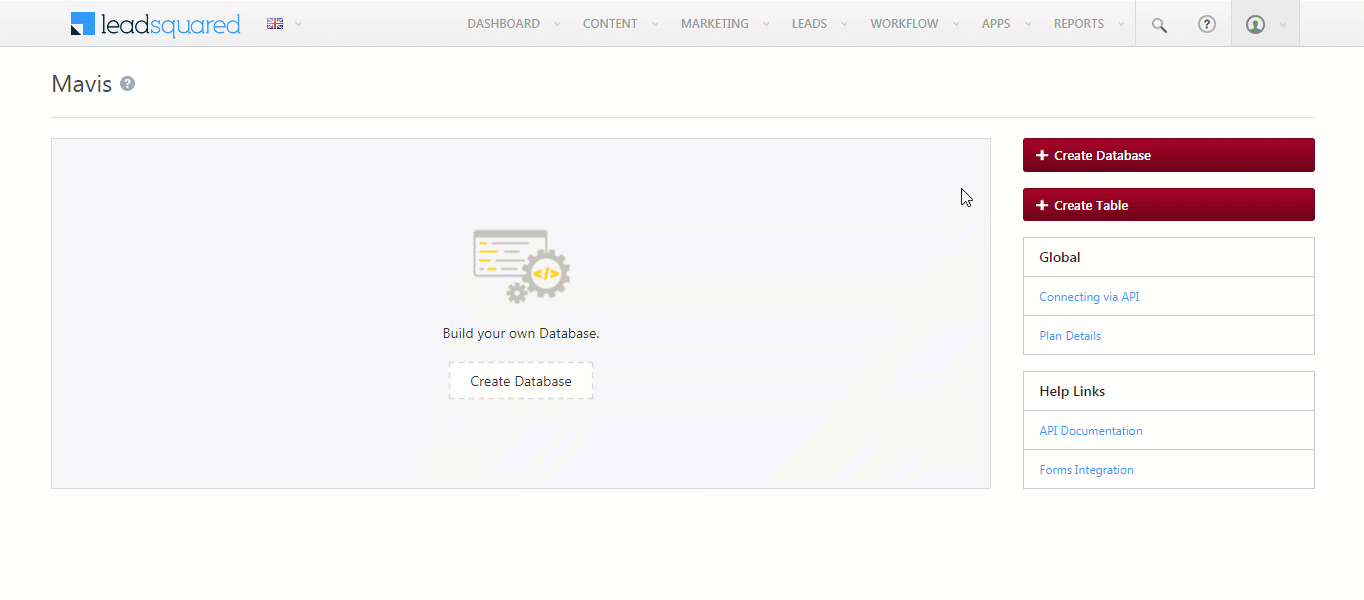
Once Mavis DB is enabled on your account, it appears under the Apps section on the main menu. You can create, edit and delete databases from here –
- Login to your LeadSquared account.
- On the main menu, click Apps>Mavis.
Create a Database
To create a database –
- On the Manage Mavis Database page, click the Create Database button.
- On the Create Database pop-up, enter the –
- Database Name – The display name for the database.
- The database name is case-sensitive.
- The database name cannot start with a special character or number.
- The only accepted special character in the database name is “underscore”(_).
- The minimum length of the database name is 3 characters, while the maximum length is 100 characters.
- Database Description – The database details you want to display (this is optional).
- Database Name – The display name for the database.
- Once you’re done, click Create.
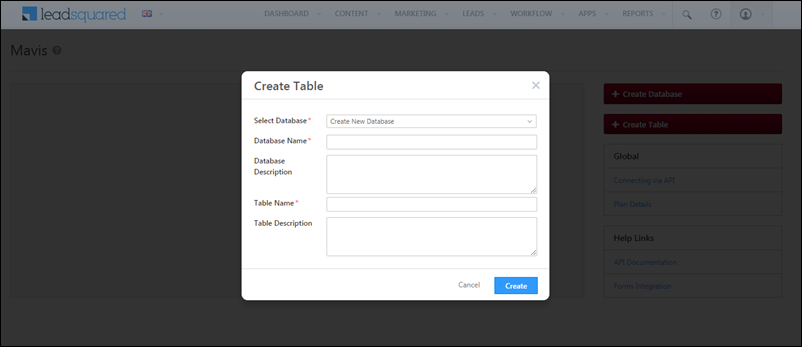
Create a Table
You can create a database and a table directly from the Manage Mavis DB page, or you can add a table to an existing database from the DB Details page.
From the Manage Mavis DB Details Page
- On the Manage Mavis DB Details page, click the Create Table button.
- On the Create Table pop-up, select Create New Database to create a new DB and table at the same time. Alternatively, you can select an existing database to which to add the new table. Enter the following details –
- Database Name
- Description
- Table Name
- Table Description
- Once you’re done, click Create.
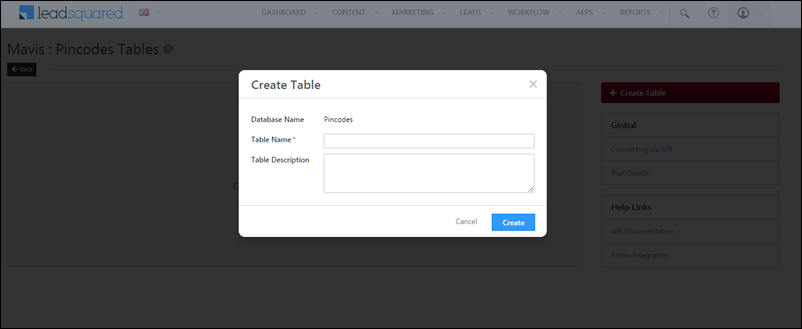
From the DB Details Page
To create a table within an existing database –
- On the Database page of an existing database, click the Create Table button.
- On the Create Table pop-up, enter the –
- Table Name
- Table Description
- Once you’re done, click Create.
Note: The table name can only contain alphanumeric characters, space, and underscore.
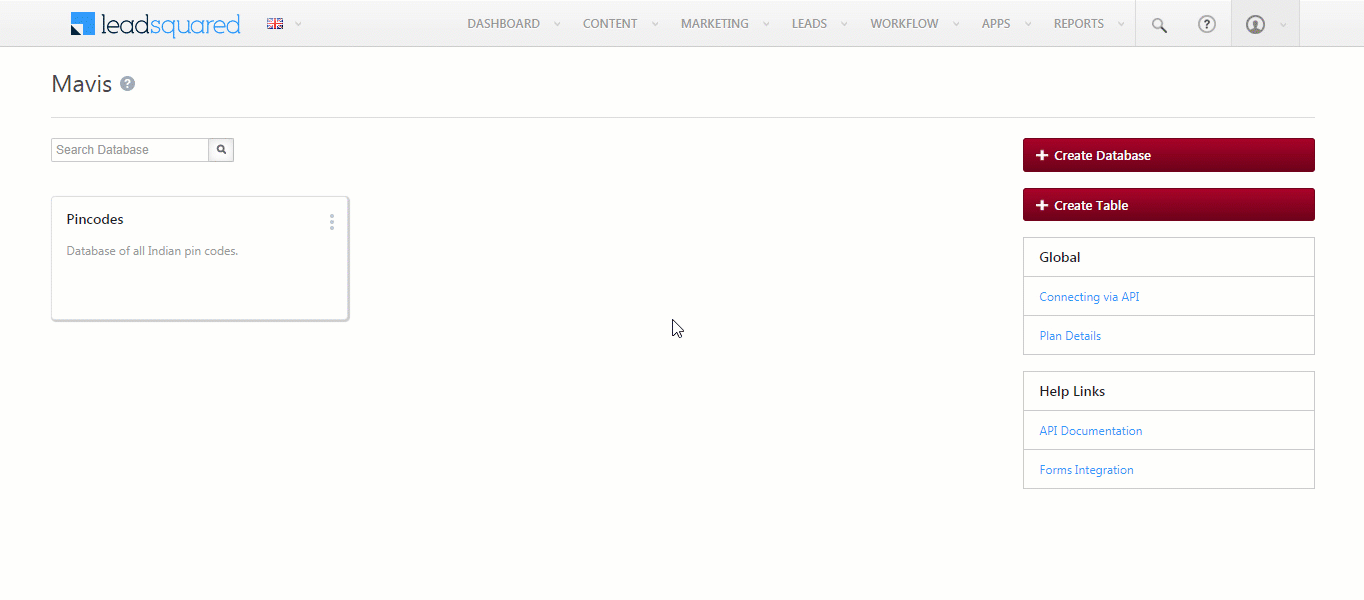
Find a Database
To search and find a database –
- On the Manage Mavis Database screen, navigate to the Search Database search bar.
- Enter the name of the database you are looking for, and click
 .
.
Note: User can search for a database using the Database Name or the Database Description.
Edit a Database
On the Manage Mavis Database page, you can edit the name and description of a database. To do this –
- Against an existing database’s name, hover your cursor over the
 icon.
icon. - From the options, click Edit.
- On the Update DB Details pop-up, edit the Name and Description of the database.
- Once you’re done, click Update.

Delete a Database
You can delete a database, along with all the tables within the database. To delete an existing database –
- On the Manage Mavis Database screen, against an existing database’s name, hover your cursor over the icon.
- From the options, click Delete.
- On the Delete Database pop-up, enter the name of the database you’re looking to delete in the search bar.
- The name you enter must be an exact match with the database’s name.
- If the name does not match with the name of the database, the
 icon will be visible.
- Then, click Confirm
Notes:
- Once you delete a database, you cannot recover it.
- Any existing APIs or LeadSquared modules related to this database and its tables used in any integrations will immediately stop working once the database is deleted.
Connecting via APIs
To access the database via APIs, you must first generate the x-api-key. To generate the key, and to know your API URL –
- On the Manage Mavis Database page, on the right-panel, under Global, click Connecting via API.
- On the API Details pop-up, against
x-api-key, click Generate Key.- To view the
x-api-key, click the icon.
icon.
- To view the
- To copy the API URL and
x-api-key, click Copy.
Notes:
- You must pass the
x-api-keyin the header of all API requests. - Every API request requires the organization code,
orgcode=<orgcodevalue>to be passed in the query string. - Only Content-Type supported in the payload/body is application/json. It is optional to pass a payload/body.
- You cannot delete or regenerate the
x-api-keyonce it is generated. - To view the complete list of APIs, view Mavis APIs.
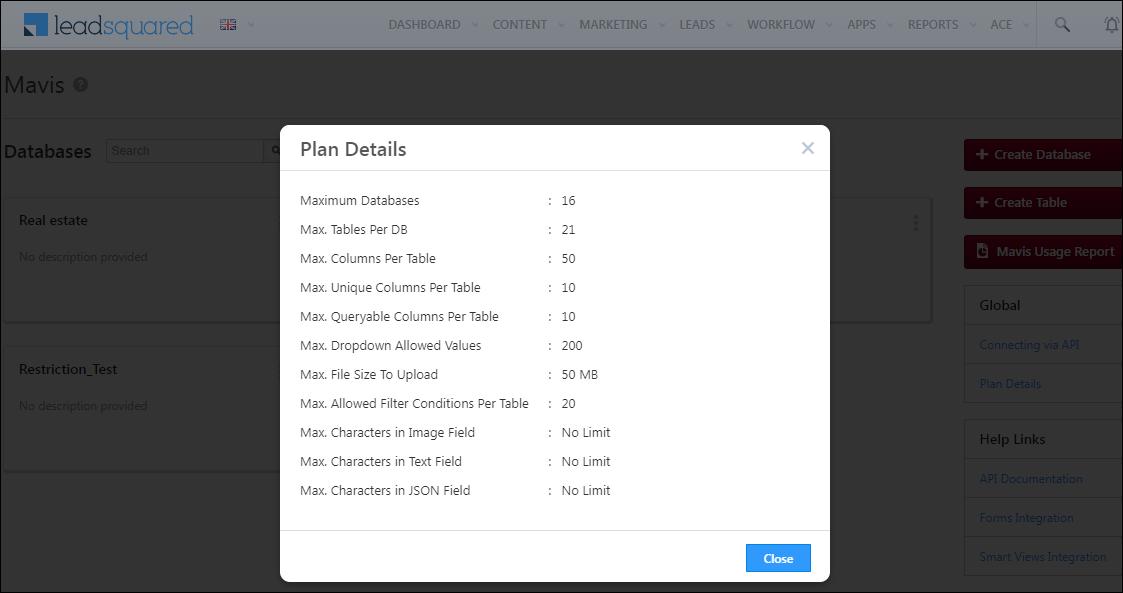
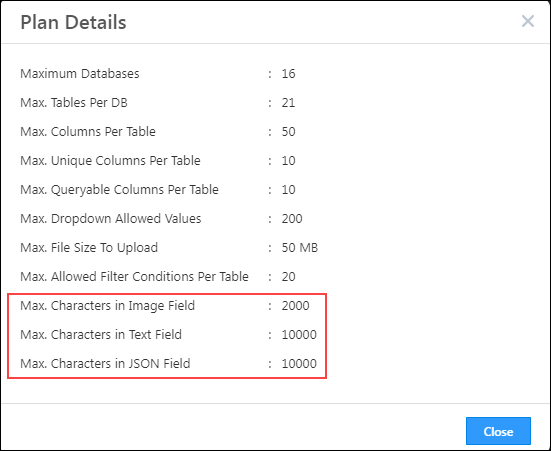
View Plan Details
Your plan details contain the limits in your Mavis plan, such as the Maximum Databases, Maximum Tables Per Database, etc. To view your plan details on the Mavis screen, click Plan Details.
Note: To change the limits on your Mavis plan (for Maximum Databases, Maximum Tables per Database, etc.), please reach out to your account manager, or write to support@leadsquared.com.
Important Note:
- If the Mavis feature was enabled on your account after 5th December 2022, text fields have a 10,000-character limit and image fields have a 2,000-character limit.
- If the Mavis feature was enabled on your account after 15th December 2022, JSON fields have a 10,000-character limit.
Next Steps
To create and manage a table within a database, please refer to Manage Tables.


