
Create a Batch Job
The Manage Batch Jobs UI
Once Batch Jobs are enabled on your account, they’ll appear under the Apps section on the main menu. You can create and manage your Batch Jobs from this page.
- Login to your LeadSquared account.
- On the main menu, under Apps, click Batch Jobs.
You can sort the grid to show jobs by status, schedule and modified on filters.
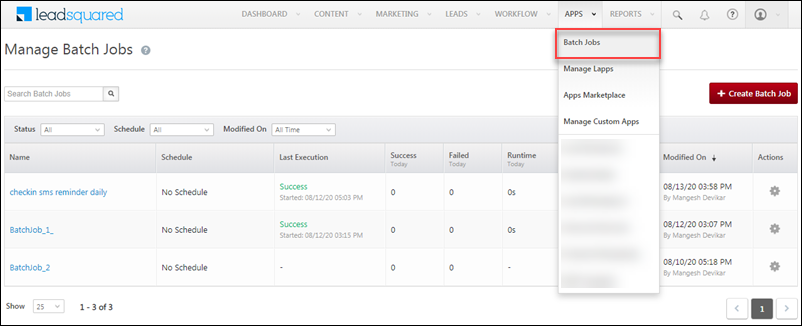
The grid shows you the following details for each Batch Job –
| Column Name | Description |
| Name | The name of the Batch Job. |
| Schedule | The scheduled frequency of the Batch Job (daily, weekly, monthly, etc.). ‘No Schedule’ if the Batch Job is configured to ad hoc.
Note: A Batch Job cannot be published or re-published if the schedule is not set (or adhoc enabled). |
| Last Execution | The status (success or failed) and date-time of the last execution. |
| Success | The number of times the job executed successfully today. |
| Failed | The number of times the job failed today. |
| Runtime | The total run-time of the job today (includes all executions). |
| Status |
|
| Modified On | The last modified date of the Batch Job. |
| Actions |
|
Create a Batch Job
To create a Batch Job –
- On the Manage Batch Jobs page, click the Create Batch Job button.
- Enter a name and description (optional), then click Create.
The Batch Jobs creation page has 3 main sections – Configuration, Logs, Audit.
Configuration
The configuration section has 4 tabs – Code, Settings, Variables and Schedule.
The code tab enables you upload a zip file containing your code. First, download the SampleCode.zip file. The file contains comments to help you write the Batch Job logic.
Note:
- Coding language must be Python.
- Only zip files are allowed and the max size is 4 MB.
- Code must contain main.py file with a
main(events)function. This is the entry point of your code execution.
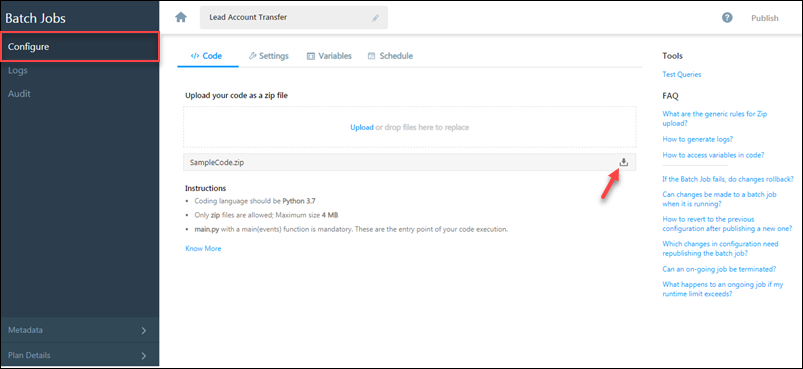
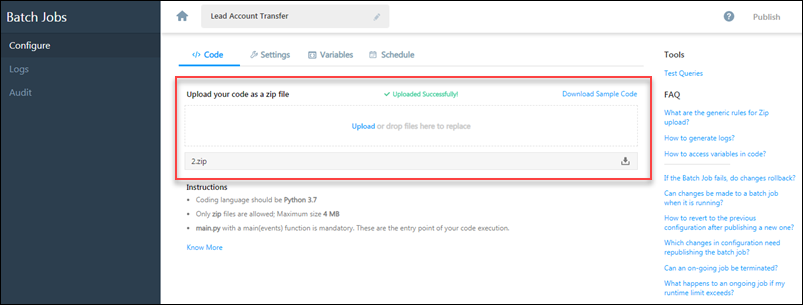
Click the Upload link or drag and drop the file into the dotted line area to upload a file. Once uploaded, you can download the file, or even download the sample code zip file again.
Note: Every time you upload the code, the name of the file changes to the latest version number. For example, the first file will be 1.zip, next is 2.zip, and so on.
Settings
The settings tab lets you configure the job’s retry count, timeout, and also send automated email notifications.
Note: The maximum values for each setting are dependent on your plan.
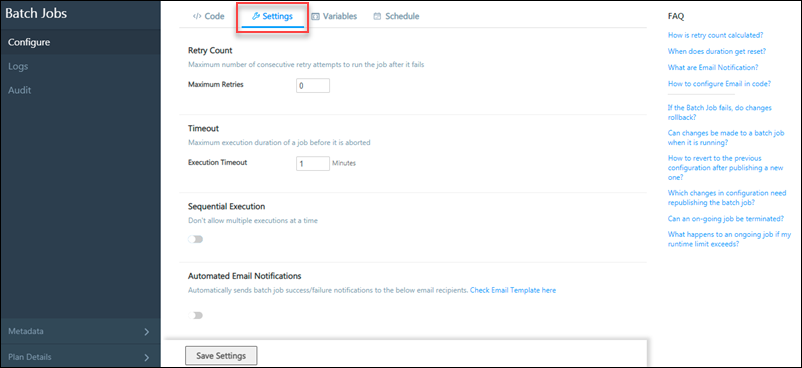
- Retry Count
Specifies the maximum number of retries to attempt if the job fails.
Retry re-executes your code from the beginning. If the retry count is set to 1, then after the initial failure, the job will be retried from the beginning.
Retry does not impact your account’s daily execution limit, but execution time will be considered. For example, if the job’s first attempt failed at 5 mins and the retry execution worked for 15 mins, the total time recorded will be 20 mins for this execution. - Timeout
The maximum duration (in minutes) for which a job will execute before it is aborted. The duration of your account gets reset every 24 hours at 12:00 AM. This depends on your account time zone (not admin user’s timezone who is setting up the Batch Job). - Sequential Execution
When enabled, only a single job execution is allowed at a time. Parallel job executions won’t be allowed.
For example, let’s say a batch job runs every 15 mins, reads data from a DB table, and creates leads in your account. If the batch job takes a longer time to execute (more than 15 mins) and the next execution starts, the two parallelly running job instances may end up reading the same data from the DB and creating duplicate leads. You can avoid these scenarios, by enabling Sequential Execution. Changes in this setting are recorded in the Audit History.
 - Automated Email Notifications
Enables automated email notifications on job success/failure. A maximum of 10 email recipients can be added.
-
- Under Email Recipients, enter the email addresses to send the notifications to, then click Add.
- The added email addresses will appear in the grid below, where you can click the slider and select whether to send the notification on failure and/or success of the job.
- Once you’ve added the email recipients, under Automated Email Notifications, click to enable the slider .
Note:
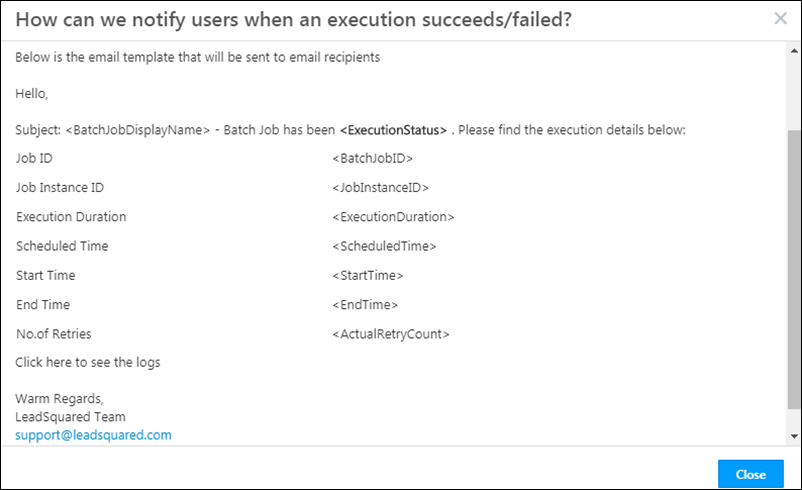
- The following email content is sent to your recipients by default. Click the Check Email Template here link to view details.
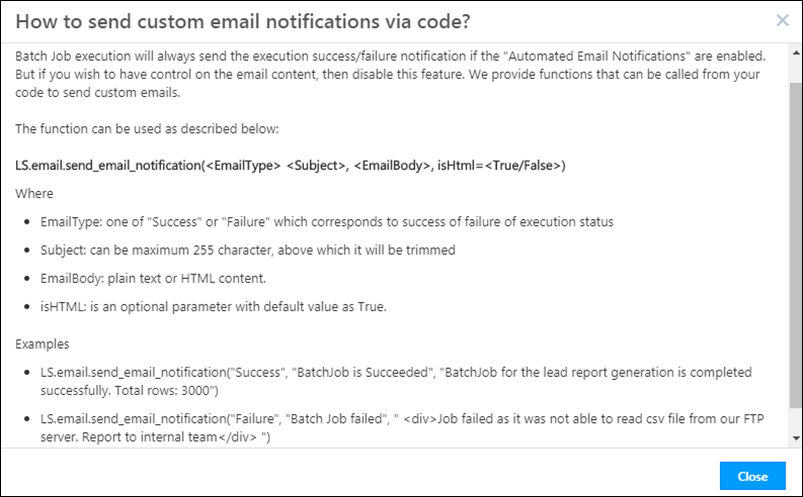
- Alternatively, you can send customized email content. To do this –
- Disable the Automated Email Notifications slider .
- Under Email Recipients, click the How to configure in code link. The pop-up will provide details of functions you can call to send custom emails.
- Disable the Automated Email Notifications slider
Click Save Settings when you’re done.
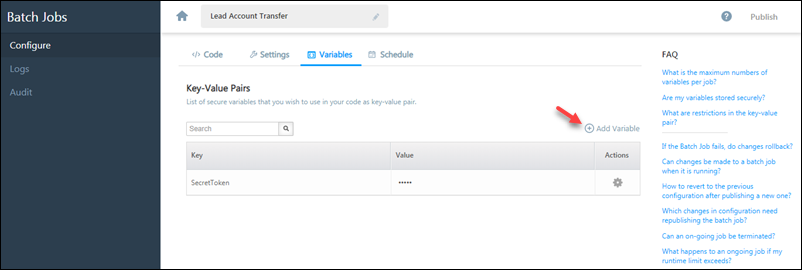
Variables
This tab enables you to store secure variables (secret keys, auth tokens, etc.) you want to use in your code as key-value pairs. These variables are encrypted and stored in our database and are not accessible to any unauthorized program or person.
- Click Add Variable.
- Enter the key-value pair, then click Save.
Note:
- Keys
- Should be minimum 2 characters.
- Allows maximum 100 characters.
- Should start with alphabet and may contain alphanumeric or _ (underscore).
- Values
- It is mandatory to provide a value for the key.
- Allows maximum 500 characters.
- There is a limit on the combined characters of all the key-value pairs, subjected to maximum size of 400KB. There is no fixed limit on the number of variables that can be created.
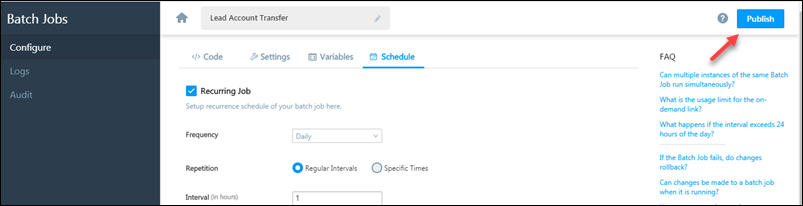
Schedule
This tab enables you to configure the schedule based on which the Batch Job will execute. You can set up a recurring job or an on-demand job. You can even set up a job to be both recurring and on demand.
Note: The maximum executions per day, the maximum allowed invocations per job, the minimum gap between schedules, and the on-demand API rate limit are all dependent on your plan.
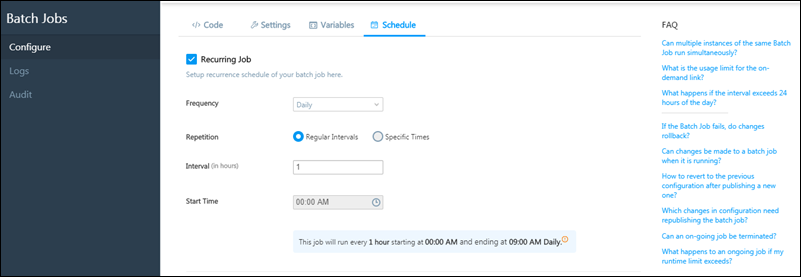
Recurring Job
Recurring jobs can be configured to execute on a daily, weekly, or monthly schedule.
| Setting | Description |
| Frequency | Daily, weekly or monthly. |
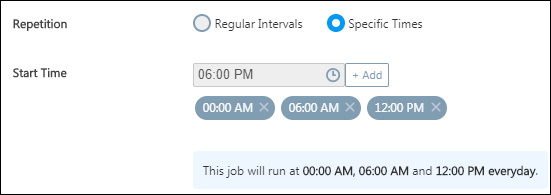
| Repetition |
|
On Demand Job
This option will generate an API URL when you publish the Batch Job. You can call this API to trigger the Batch Job.
- The HTTP method for the API is
POST. x-api-keymust be passed in the header.Content-Typeisapplication/json.- This is optional, if not passed specifically, default is application/json.
- Note that Batch Jobs currently supports only application/json. Passing any other Content-Type will result in code error and Batch Job failure
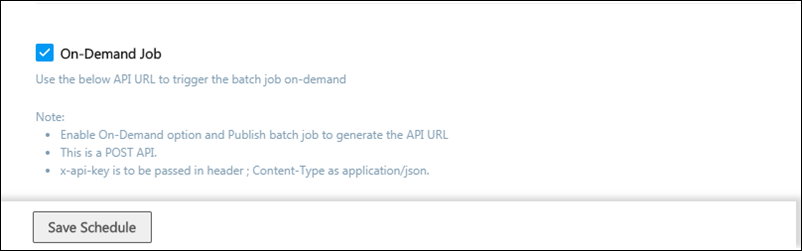
Click Save Schedule to save your settings.
Can multiple instances of the same Batch Job run simultaneously?
Yes, multiple instances of the same Batch Job can run simultaneously. For example, let’s say the job first ran at 04:00 AM and was expected to complete execution in 2 hrs. If the same or different Batch Job is scheduled at 05:00 AM, there won’t be any issues related to initiating the job’s execution.
What happens if the interval exceeds 24 hours of the day?
There are two parts to this question –
- What if my job starts before 12 midnight and continues into a new day?
In this case, the job will execute successfully. The number of minutes/hours past 12 a.m. will be counted in the new day. - What if the job execution takes more than 24 hours?
Job execution time is only limited by execution timeout. If your plan supports execution timeout of more than 24 hours, you won’t face any issues.
Publish a Batch Job
Once you’ve saved your schedule settings, in the top-right are of the page, click Publish. On the confirmation pop-up click Publish again.
Export
Once a Batch Job is published, the latest version of your code running on the server can be exported. Under Published, click Export to download the exported code as a zip file.
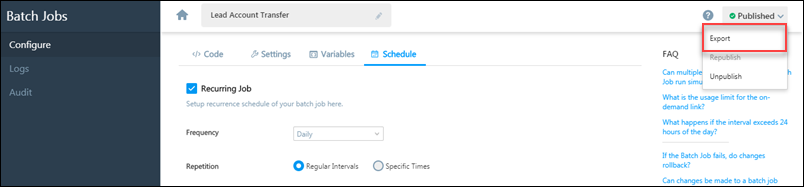
You can also unpublish the code from the same menu.
Next Steps
- Learn how to check Batch Jobs Logs.
- View the Batch Jobs Usage Report


